Our log cabins can be used for a wide variety of uses within your garden. They can be used as; a garden family room where your family can enjoy a summer evenings meal together; a home office for you to run your business from; a games room for your children; an ideal space for a hot-tub or just a place for you to escape to read your favourite novel in peace and quiet.
At ILikeSheds we can provide you with a wide variety of log cabins, which range in size, shape, style and price. Our website offers you an easy way to find the perfect product for you in the comfort of your own home; you are also more than welcome to call our help team with any questions or queries about your product of interest.
Our log cabins start at 7ft wide and can be as big as 28ft wide, there are many sizes in which you can choose from to fit your outdoor space perfectly; however, if we don’t supply the exact size you are looking for, we do offer a bespoke log cabin range in which we are able to manufacturer cabins to your satisfaction.
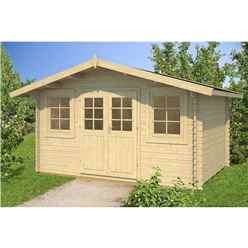
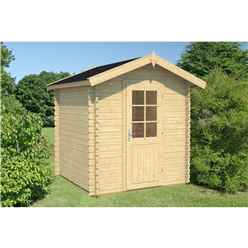
Our range of Home Office Log Cabins are ideal for a garden office. If you are starting your own business or work at home then the Home Office Log Cabin provides you with a great office space at the fraction of the cost of renting a traditional office space. Our Home office range starts with the 10ft x 8ft Stowe Brunswick Log Cabin (2.99m x 2.39m) - 28mm Wall Thickness available in a number of different sizes.
There are many things that you are able to turn a log cabin into such as a home office, garage, gym or even a guest house. If you are searching for that perfect place to set up an office, look no further as you can have your own office in the surroundings of your home. It is ideal for you to create a working environment due to the peaceful atmosphere and no interruptions. You can easily turn your log cabin into your own space by adding your own mark to it, whether it be pictures, a sofa, desk or even plants. Turning your log cabin into your own personal gym will assist you with finding the motivation to work out or even blow off steam; and by having it in the space of your own it makes it that one step closer to reaching your goal. Having your own gym in your garden means you are able to go whenever you want, no travelling costs and you can play your own music which can motivate you to work or push even harder.
If you are thinking about moving house because you are looking for extra room, but don’t want to move from your home, why don’t you purchase one of our log cabins which can be turned into an extra bedroom? It is the perfect solution for staying in the same location and in the same house which has provided you with many memories which you can add to. You are able to make this cabin into your own place by adding decorative furniture, stylish curtains and you can even paint the interior to make the log cabin completely unique. The cabin can be built in a range of thicknesses which provide you with more sufficient insulation, we are also very security conscious so our cabins have the feature of a lock and key to make sure you feel safe.
If you are looking for a secure garage then consider our range of log-cabin garages. Our log-cabins garages are constructed from 44mm tongue and groove cladding. The tongue and groove joints and wind-tight chalet connections ensure that the Log Cabin Garage can withstand strong winds and poor weather conditions, whilst the door handle cylinder lock provides you with garage security. The wide doors allow easy access for most family sized vehicles and provide ample room on either side of your car.
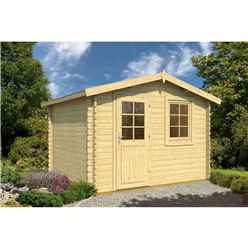
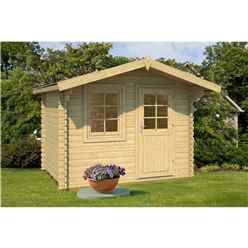
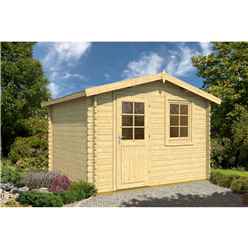
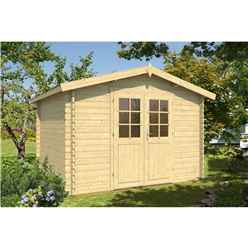
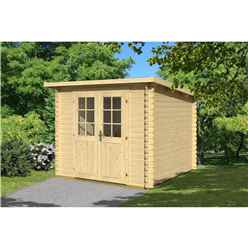
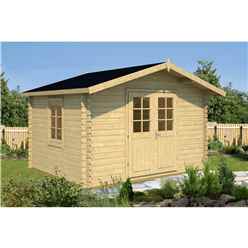
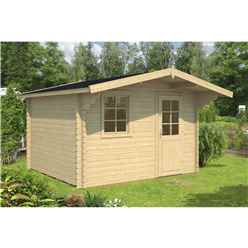
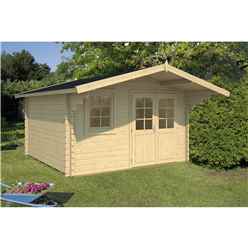
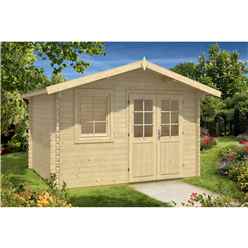
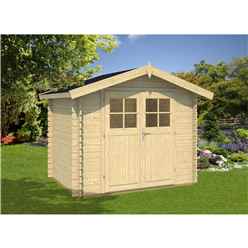
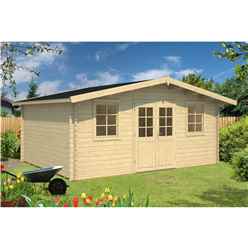
The Relax Traditional Log Cabin range is designed around the feel of a Scandinavian style log cabin to add a touch of quality to your garden.
The Relax range of log cabins incorporate a stylish roof overhang, double glazed windows, tilt and turn windows, lock and key, Georgian style windows if required. The Relax range is available in a number of different sizes from 3m x 3m 10ft x 10ft (3m x 3m) TIGNES Log Cabin (base price 28mm), to our popular selling home office 12ft x 12ft (3.5m x 3.5m) Kaprun Log Cabin with FREE 28mm T&G Floor to our larger log cabins like the 28ft x 15ft (8.5 x 4.5m) MORZINE Log Cabin (base price 44mm)
All the Relax Log-Cabins can be amended to cater for your requests and we offer a bespoke service on all our Relax Log Cabin range which means that we can supply any style of size of cabin you may be looking for. Just get in touch and we will give you our best quote.
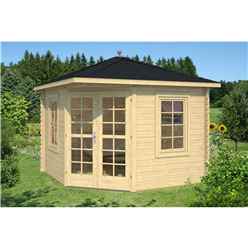
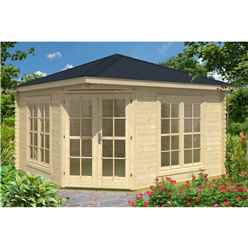
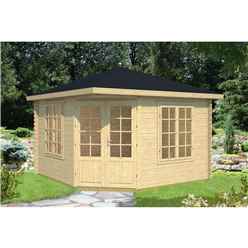
A corner log cabin is a perfect way to put to use the corners of your garden. We provide a range of corner log-cabins which will fit the perfect space especially for those with limited space.
The Corner Log Cabin range begins with the 8ft x 8ft (2.5m x 2.5m) CHABLE Log Cabin (base price 34mm) which can fit into the corner of a garden, yet still provides a garden room large enough to relax in. This Corner Log Cabin is also available in a number of other sizes at request, offering you even more space to sit and enjoy being in your garden.
Further up the range, we offer the17ft x 10ft (5m x 3m) ASPEN PLUS Corner Log Cabin with FREE Felt, which is a 5m x 3m corner log cabin that includes a side shed within its structure for additional storage capacity. This Corner Log Cabin with side shed can be built either left- or right- facing depending on the layout of your garden – simply select which you require on the product page.
The pinnacle of the Corner Log Cabin range is the 17ft x 10ft (5m x 3m) ASPEN GRANDE Corner Log Cabin with FREE Felt, which is the same 5m x 3m base as the Corner Lodge, but without the side shed partition, meaning that there is more than enough space to use your log cabin as a luxurious summer house, home office or gym.
When purchasing one of our log cabins we kindly ask that you prepare a base for the cabin to sit on top of. We do recommend that your base is solid such as paving slabs or concrete and that you use a spirit level to make sure that the area in which you intend to place your cabin on is level. If you don’t have a base, you don’t need to worry as we have a solution for you; we can provide you with various options for you to choose from. We have dense building blocks which are quick and easy to use for uneven ground or if the cabin needs to be raised slightly off the ground, they are laid in the same direction as the bearers which are beneath the floor. For a cheaper option we offer a pressure treated wooden base frame which is custom made so it can fit your building perfectly (please call for a quote). The most popular option are our paving slabs which are laid level with sand, cement and a membrane that prevents weeds growing through. The last base we have to offer is the more expensive base but is very practical, this is our concrete pad. This is great for larger buildings and where the ground is fairly level and isn’t prone to sitting on water; you would need to have it raised from the ground so that you can allow drainage. We do also recommend that the concrete will fit the building exactly to point so that it prevents splash back from rain. If you are interested in any of the options above, please call our sales team and they will be happy to provide you with a quote.
For some of our selected log cabins we offer an installation service, this is at an added cost and our team will be happy to assist you with a quote; however, we do have a range of log cabins which offer a free installation service. If you choose to have your product installed we do ask that the area has been cleared and that there is easy access into your garden for the team. This is vital as the installation team need an adequate amount of room to be able to move around the cabin and erect it. If there is no access into your back garden, we ask that you take the parts through the inside of your home to the outside before the team arrive as the team are not insured to be inside your house. The entirety of the build can take 1-3 days, the procedure we take is that we deliver the building to you and then the following day we will send out the installation team fairly early so they can make a start on the erection of the cabin. The time the cabin takes to build will totally depend of the size but can take up to three days to complete. Our installation team are all professionals with over 25 years of experience, so your mind is now able to rest with the reassurance your cabin will be built in good hands and to the highest standard. If you are worried about having to prepare a base for your building we do offer an extra service where our team are able to prepare your base at an additional cost. Contact us today for a quote.
Log cabin installation:
Ensure that you base is firm and level, for log cabin we would advise either a solid concrete base or concrete slabbing to the required dimensions of the building.
We recommend that a gap of 2ft is left between the edge of the base and any surrounding walls, fences or any other items, this will ensure there is sufficient clearance for building your log cabin and to allow you to treat the building afterwards with a good quality wood preservative.
Additional tools will be required to fit the building:
A rubber mallet
Hammer
Tape measure
Spirit level
Saw and a portable electrical drill are needed.
To start lay your floor bearer out and evenly space them across your base.
Whilst we would not advise installing in adverse weather if necessary some pvc striping can be used to cover the bearers and prevent any moisture from reaching the floor boards.
Once the bearers are down lay the initial base logs out across the bearers ensuring that all angles are square. These are then to be secured to the bearers using screws to prevent movement of the building.
Using a rubber mallet gently but firming tap the logs together at the joints making sure they are tightly secured within the tongue and groove across the entire length of the log .
Once you have built up the logs sufficiently around the entirety of the building to around a third of the way up the windows these can now be slotted into the areas provided, pressing down firmly on the top of the kit to make sure there are no gaps around the bottom edge.
Continue to build up the height of the wall logs to the height of the door frame work.
These framing pieces to be slotted to the bottom, side and top of the frame and tapped securely into place using the rubber mallet.
Once the wall logs have been successfully built up the next stage is to install the roof joists which are tapped in to the upright channels, these run from one side of the building to the other.
Your log cabin should be beginning to take shape you can now work on some of the smaller areas of the construction process.
The veranda area in front of the door is created using the pressure treated boards provided. If you use a spare board as a spacer between each slat this will create a consistent and even gap between the boards without need for constant measurement. The boards are then to be screwed to the bearers beneath ensuring that they are flush with the side of the log cabin.
The exterior support beam can now be installed onto the corner of the decking to support the overhang of the roof beams you may need to cut this down to fit as the beam is not pre-cut to allow for the roof beams. It can then be secured using appropriate screws.
When starting the roof place the initial board with the groove facing away from the building, line it up to the end of the roof joist and secure in place, then secure along the roof support beams before placing any other boards.
Lock all boards in place making sure the tongue of the board is securely within the groove of the next and flush at the edge before nailing each board to the roof beams at each end. When you reach the last board of the roof you may find that you have a larger overhang on the board than needed this should be cut down to be level with the end of the roof support beam, don’t worry this is perfectly fine and any rough looking edges will be covered by the roofing felt and facia boards.
When installing the floor secure the initial board against the cabin wall with the groove facing outwards and nail in place. On each board thereafter place the nails at an angle to make sure the slats are pushed together firmly with the groove of the next board covering the end of the nail. As with the exterior roof support you may need to measure and cut sections of the floor to allow for the internal angles of the wall logs. When you have finished with the floor you can now install the finishing strips which go around the edge of the flooring. Measure the internal dimensions of the cabin and then cut each length to size these are then secured around the edges of the floor to neaten any rough edges and give a more aesthetically pleasing floor.
Simply line up the barrels of the door hinges with that of the framework and slot the doors down, once the doors are closed they cover the framework preventing their removal for security.
The storm braces give extra support to the building during periods of high winds these are a fixed to the walls of the log cabin at the top and bottom of the bracer by drilling through the wall log and securing the bolt on the other side of the wall.
With the roofing felt roll this out in a large area and measure enough felt to cover the roof across the length of the apex, these need to be long continuous strips to ensure a secure covering, for this building you will need 5 strips. The felt should be laid leaving a 2 inch overhang along each edge of the building so that the felt can be secured to the roof beams and further protected with the fascia boards.
Secure the felt along the edges, placing tacks approximately 2 inches apart along the entirety of the roof. When laying the next strip of felt, overlap the lower piece by approximately an inch to ensure that water cannot collect on the roof and will run off evenly.
Fold the roofing felt over the edge of the roof and secure firmly to the ends of the roof support beams. Use the fascia boards to leaver the roof felt down this will now secure the felt and get your log cabin looking neat and tidy.
When attaching the fascia boards and finials, please make sure to pre drill any holes to prevent the wood from splitting.
For the final touches, ensure that the front felt of the log cabin is secured with even tacks for a professional finish
Really pleased with new garden shed arrived as described, no issues with delivery, putting together and no damage. Very happy with purchase looks great. Thanks guys
Brilliant website with very informative information. very easy to understand as regards all the items that were for sale. The ordering process was also very easy to follow and do. picking your delivery date again is very easy to understand and do. All in all, a very easy and pleasant experience well done to iLikeSheds.
Great customer service, answered all the questions I had. Exceptional delivery service, delivery driver went out of his way to put my shed where I wanted it. Everything okay
Really impressed arrived before due date, really sturdy and easy to assemble